
Allow printing from public computers secured by SiteKiosk Online? This step-by-step tutorial matches the video exactly, showing you how to enable printing with the default Windows printer, add print buttons to browsers, and configure limits – perfect for kiosks with all the features your deployment needs.
How to allow printing in SiteKiosk Online
Follow these steps from the video to configure allow printing in SiteKiosk Online for a Windows device.
1. Prepare the printer in Windows
-
On the kiosk PC, install your printer in Windows and set it as the default printer before you install the SiteKiosk Online client.
-
SiteKiosk will automatically use whatever printer is configured as the Windows default when you use automatic printing.
2. Open your project in the management portal
-
Log in to the SiteKiosk Online management portal.
-
Go to Projects and create a new project.
-
In the video, the Start screen template is selected as the example start project.
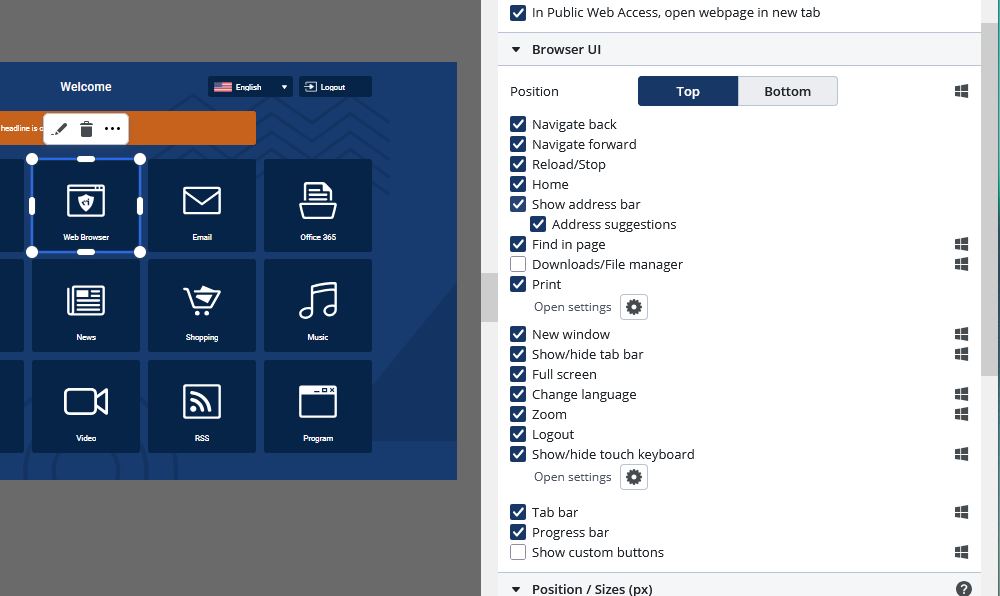
3. Add a browser and enable a print button
-
In your project, add or select the browser element you want users to print from.
-
Open the element’s properties.
-
Scroll down to the Pop-up section.
-
Activate the print button on the browser toolbar so that when the browser opens, a toolbar with a print icon is displayed.
4. Open the print settings from the warning icon
-
After enabling the print button, notice the warning text that printing is not activated for this project and the small settings (gear) icon next to it.
-
Click that settings icon, or use the Settings button at the top of the editor; both open the same Printing settings menu for the project.
5. Allow printing for the project
-
In the Printing settings, check the Allow box to allow printing for this project.
-
With these default settings:
-
SiteKiosk uses the Windows default printer.
-
Printing happens automatically without showing a print dialog.
-
6. (Optional) Show a print dialog and limit usage
-
If you have more than one printer and want users to choose, enable the option to show a print dialog before printing.
-
Adjust limits for:
-
Number of print jobs allowed.
-
Pages per print job.
-
-
Configure margins if your content needs specific layout adjustments.
7. Save your print configuration
-
Click Save in the Printing settings to keep the changes.
-
Your project now:
-
Has printing allowed.
-
Shows a print button on the browser toolbar.
-
8. Allow printing for applications (optional)
-
If you have another application in the project (instead of the browser) that should print:
9. Publish to a device and test
-
After enabling allow printing, click Publish to send the updated project to your device.
-
On the kiosk device:
-
Open the browser from the project.
-
Use the print button on the toolbar to test printing.
-
-
Confirm that the print job goes to the expected default printer and that any limits or dialogs behave as configured.
These steps match the video and show exactly how to allow printing in SiteKiosk Online using the default Windows printer and the project’s printing settings.

FAQ: How to allow printing in SiteKiosk Online
Q: What do I need to do first to allow printing in SiteKiosk Online?
A: Install your printer in Windows and set it as the default printer before installing SiteKiosk; automatic printing will use that default printer.
Q: Where do I enable “allow printing” in my SiteKiosk Online project?
A: In the management portal, open your project, go to Settings → Printing, and check the Allow box to enable printing for that project.
Q: How do I add a print button to the browser in SiteKiosk Online?
A: Select the browser element, open its properties, go to the Pop-up section, and activate the print button on the browser toolbar so a print icon appears when the browser opens.
Q: Does SiteKiosk Online always show a print dialog when users print?
A: No. By default, when you allow printing, it prints directly to the Windows default printer with no dialog. You can optionally enable Show print dialog if users should choose a printer.
Q: Can I limit how much users can print from SiteKiosk Online?
A: Yes. In the Printing settings you can set limits for number of print jobs and pages per print job, plus adjust margins if needed.
Q: How do I allow printing from an application instead of the browser?
A: Open project Settings → Printing, enable Allow printing, and any supported application in that project will be able to send print jobs via the default printer.
Q: What should I do after I enable allow printing in SiteKiosk Online?
A: Save your settings, publish the project to the device, then test by opening the browser (or app) on the kiosk and using the print button to confirm the printer works as expected.